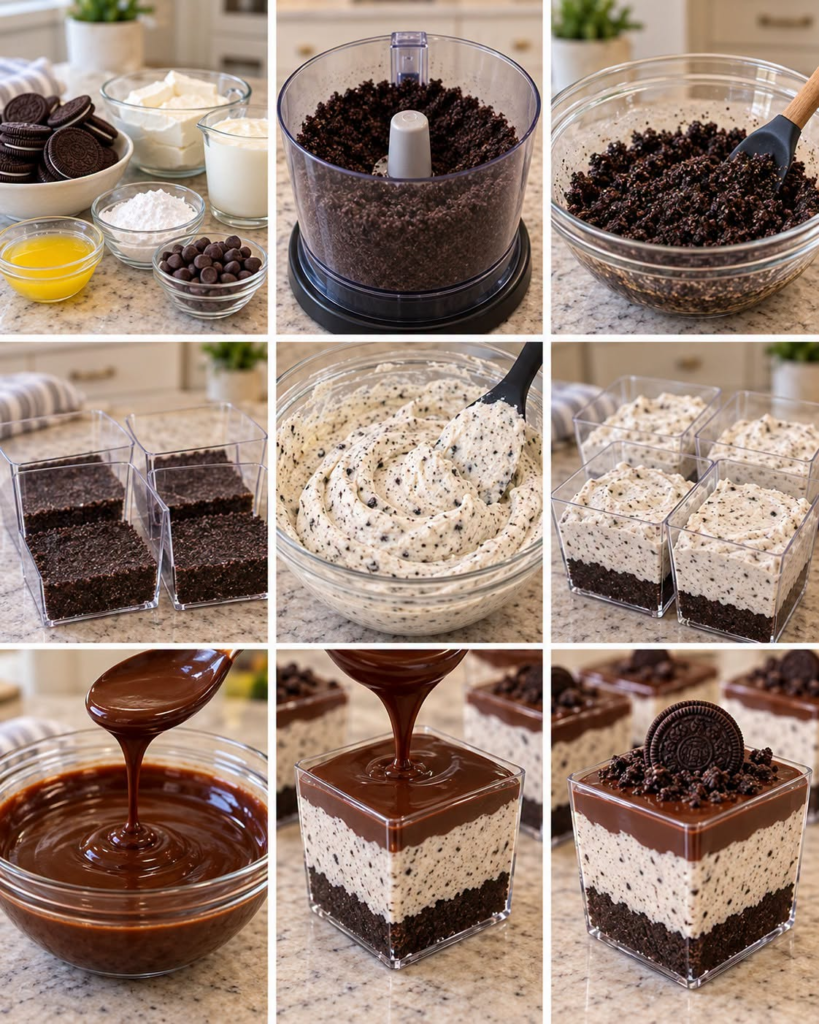
These No-Bake Cookies and Cream Chocolate Cheesecake Cups are rich, creamy, and incredibly easy to make. With a crunchy cookie crust, smooth chocolate cheesecake filling, and crushed cookies throughout, they make a perfect individual dessert for parties, holidays, or whenever you’re craving something sweet.
Ingredients
Cookie Crust
- 16 chocolate sandwich cookies
- 3 tablespoons unsalted butter, melted
Chocolate Cheesecake Filling
- 8 oz (225 g) cream cheese, softened
- ½ cup powdered sugar
- 1 teaspoon vanilla extract
- ½ cup semi-sweet chocolate chips, melted and slightly cooled
- ½ cup heavy whipping cream
- 8 chocolate sandwich cookies, roughly crushed
For Topping
- Whipped cream
- Extra crushed chocolate sandwich cookies
- Chocolate shavings, optional
Instructions
1. Make the Cookie Crust
Place the chocolate sandwich cookies in a food processor and pulse until finely crushed.
Add the melted butter and pulse again until the mixture resembles wet sand.
Divide the mixture evenly between 6–8 small dessert cups. Press the crumbs gently into the bottom of each cup.
Place the cups in the refrigerator while you prepare the filling.
2. Prepare the Chocolate
Melt the chocolate chips in a microwave in 20-second intervals, stirring between each interval. Continue until smooth.
Allow the melted chocolate to cool slightly. It should be warm but not hot when added to the cheesecake mixture.
3. Make the Cheesecake Filling
Beat the softened cream cheese and powdered sugar until smooth and creamy.
Add the vanilla extract and melted chocolate. Beat until completely combined.
In a separate bowl, whip the heavy cream until soft-to-medium peaks form.
Gently fold the whipped cream into the chocolate cream cheese mixture until light and fluffy.
4. Add the Cookies
Fold the roughly crushed chocolate sandwich cookies into the cheesecake filling.
Don’t overmix—you want little pieces of cookie throughout the creamy filling.
5. Assemble the Cups
Remove the chilled cookie crusts from the refrigerator.
Spoon or pipe the chocolate cheesecake mixture evenly into each cup.
Smooth the tops or create decorative swirls using a piping bag.
6. Chill
Refrigerate the cheesecake cups for at least 3–4 hours, or preferably overnight.
This gives the filling enough time to firm up and develop a rich, creamy texture.
7. Garnish and Serve
Just before serving, top each cup with a small swirl of whipped cream.
Sprinkle with crushed chocolate cookies and add chocolate shavings if desired.
Tips for the Best Cheesecake Cups
- Make sure the cream cheese is fully softened before mixing.
- Let the melted chocolate cool slightly before adding it to the cream cheese.
- Don’t skip the chilling time—the filling needs time to set.
- For a stronger chocolate flavor, use dark chocolate instead of semi-sweet chocolate.
- You can make these cups a day ahead, making them convenient for parties and gatherings.
Prep Time: 20 minutes
Chill Time: 3–4 hours
Total Time: About 4 hours 20 minutes
Servings: 6–8 cheesecake cups
Storage
Keep the cheesecake cups covered and refrigerated. They are best enjoyed within 3 days.